
| Home | Overview | Tutorials | Support | ||||
| Inventory | Stores | Shopping | Search | ||||
| Home | Overview | Support |
| Tutorials | ||||
| Inventory | Stores | Shopping | Search | |
Tools
Sharing Lists Through Email
If your iPhone or iPod Touch is configured to send email, you can email your current shopping list to another person.
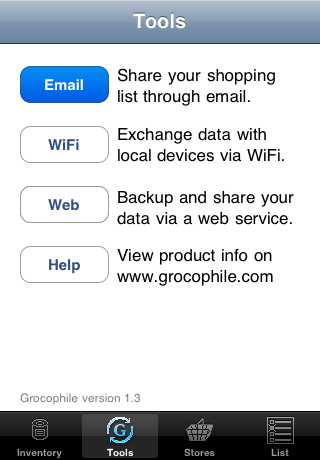
To send your shopping list as an email message, tap on the Tools tab, then tap the Email button. Grocophile will compose an email message for you, then switch to the Mail program where you can address the message and make any edits you like.
Backing Up and Sharing Data via the Internet
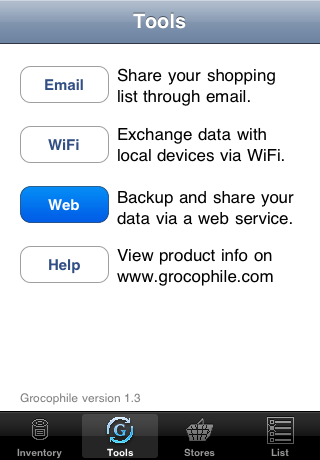
Grocophile users can backup, restore, merge and share data via the Internet using any of three supported web services: Dropbox, MobileMe and Google Documents.
Dropbox is a web service that allows you to backup data and share data among your computers and mobile devices. A free version of the service allows you to store up to 2 GB of data, which is far above the data requirements for Grocophile. Higher storage limits are available on a subscription basis. If you don't already have a Dropbox account, you can set one up through a web browser, or even directly inside Grocophile; all you need is an email address. See the Dropbox tutorial for more information.
MobileMe is a paid service offered by Apple Computer. A free trial service may be set up through your web browser.
Google Documents is a free service offered by Google. Although Grocophile continutes to support Google Documents, we recommend you use Dropbox or MobileMe. See the Google Documents tutorial for more information.
You can share your Grocophile Inventory, Stores, and List data with other users over WiFi (aka Airport or 802.11b). This is best used to share data with others in your household that want to use the same data you have entered, and allows you to share your shopping list within the Grocophile interface rather than as a plain text list in an email message.
In order to use the data-sharing features of Grocophile, both devices (iPhone or iPod Touch) have to be connected to the same WiFi network.
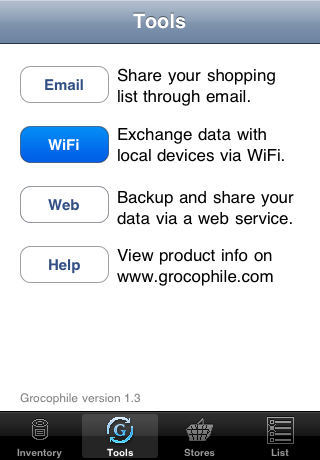
A normal level of caution is advised when using the network sharing features of Grocophile, which are only enabled when you tap the WiFi button. We recommend that you use a trusted WiFi network to transfer data between devices. More details about Grocophile and network security are available in the Network and Data Security section below.
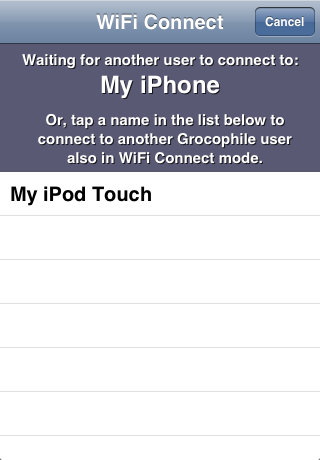
After tapping the WiFi button, Grocophile brings up a list of available devices that also have enabled Grocophile WiFi sharing. It may take a minute or so for a device to become visible. When you see the device you want to share with, tap its name to ask permission to connect. Once the other user has accepted your connection request, you'll be taken to the Sharing screen which will let you transfer data between devices.
If the other device doesn't show up on the list, make sure both devices have WiFi enabled in the Settings application, both are connected to the same WiFi network, and both are showing the "WiFi Connect" screen.
If the two devices are still not seeing each other over the network, there are a couple of other possible causes.
First, the network may be configured incorrectly on one or both devices. Check with the network administrator to make sure that your settings are right and that both devices are on the same subnet.
Second, as a security precaution, some WiFi networks don't allow two devices to communicate with each other, they may only communicate with the external Internet. This prevents potential hostile activities on the local network, but also prevents useful data transfer between devices. If you suspect this is the problem, contact the network administrator.
Once you have connected to another device, you are ready to share data, either replacing your data with the data on the other device (Clone) or merging data from the other device with your data (Merge).
Cloning Data
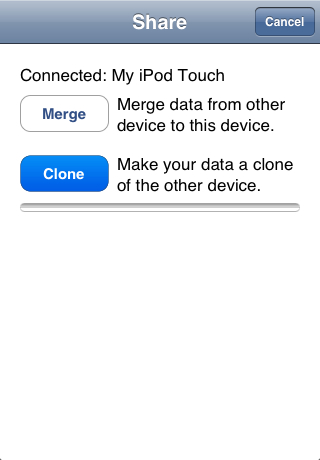
If you wish to reset your data to be an exact copy of the data on another device, connect to that device over WiFi as described above, then tap the Clone button.
When you tap the Clone button, your device will ask the other device to confirm the operation. You may cancel the operation before the other user has confirmed, but not after. Once confirmed, the operation will proceed and cannot be undone.
Warning: Doing a Clone operation will completely replace all of your data, so you will lose any inventory items, stores, aisle or list items you created on your device. If you have created some items you want to keep, but also want the items entered on another device, use the Merge command instead.
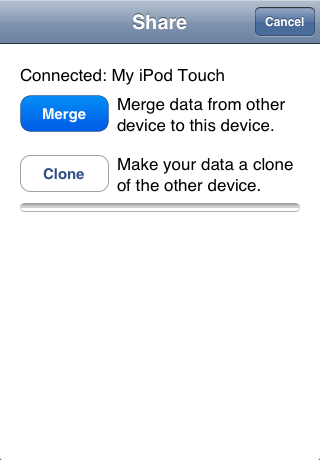
If you wish to add another user's data and incorporate that user's changes to your existing inventory items, stores, aisle, and list items, connect to that device using WiFi as described above, then tap the Merge button.
When you tap the Merge button, the other device will present an alert to confirm that the other user wants to allow you to copy the data from that device. Once permission is granted, the data from the other device is transferred over and compared to the data on your device.
New items that the other user has added will be added to your data without any need to review those items. You will have an opportunity to cancel the merge in case you decide you don't want to take the new data.
Items that exist on both devices and have been edited by either user will require you to review them and decide which version you want to take. In some cases, you may choose to take one over the other, in other cases you may want to take both versions of an item. You will have full control over what happens during the merge.
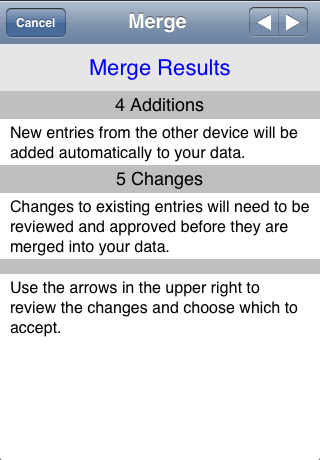
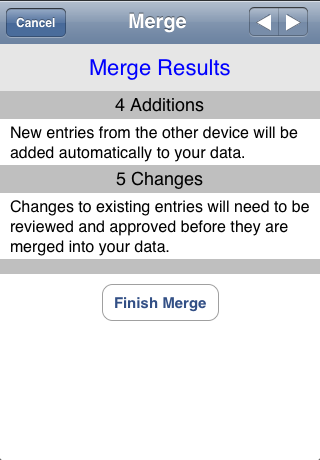
After transferring the data from the other device for a Merge, Grocophile will present you with a summary screen that explains what will happen if you choose to complete the merge.
New entries will be added to your inventory items, stores, aisle and list items. You don't have to do anything to confirm these additions.
Changes to existing items will need to be reviewed and confirmed before the merge can be completed. Use the arrows on the right side of the top title bar to move through the various changes and choose how you want to handle them.
If you don't have any changes to be reviewed, you'll get a button to finish the merge operation instead of the text explaining how to review the changes. This final screen is shown below.
Reviewing Merge Changes
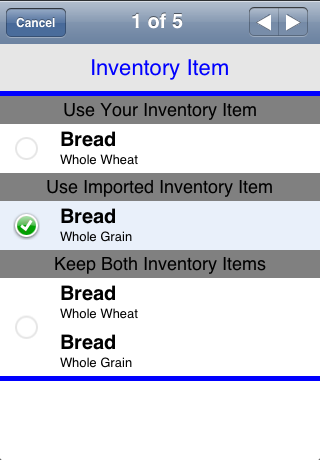
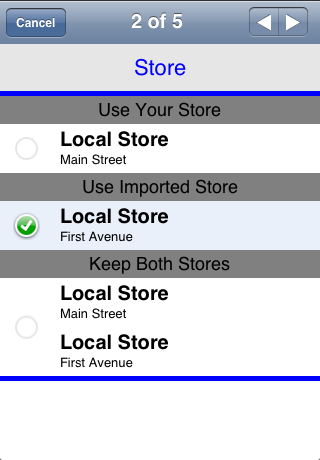
For inventory items that have been edited on either device, you have the choice of keeping your version, replacing your version with the imported version, or keeping both versions (effectively keeping your version of the item and adding the other version as a different item to your data set).
To select which option you want for this item, just tap on it and your choice will be denoted with a green checkmark.
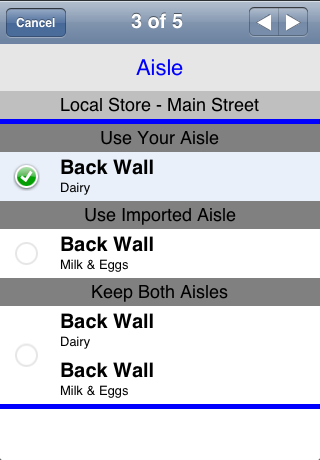
Changes to stores and aisle names will be shown in similar screens.
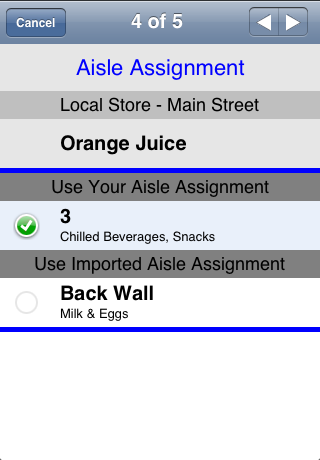
If the aisle assignment for an inventory item at a given store is changed on one of the devices, you will get an Aisle Assignment change screen. Since a given item can only have one aisle assignment at a given store, there's no option to keep both; you have to choose one or the other.
The Aisle Assignment change review screen shows, from top to bottom, the store to which the assignment applies, the item to which the assigment applies, then the two options.
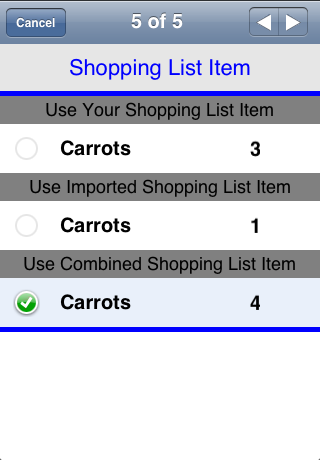
The change review screen for Shopping List Items is similar to the others, but instead of having an option for "both" you get a "combined" option that adds the quantities of the two versions.
Once you have finished reviewing any changes, advance again to see the Merge Results summary view. You should now have a "Finish Merge" button. Tap that button to complete the merge and make the edits to your data set.
If you get back to the summary screen and still don't have the "Finish Merge" button, scan through the change review screens again to find any items that don't have a checkmark next to one of the options.
After you have merged data onto your device, you can get the revised data set onto the other other device by going back to the WiFi sharing, connecting the devices and having the other device do a "Merge" or "Clone" operation.
Grocophile is designed with basic network security in mind. Every action that occurs over the network requires your specific request or approval. No device can connect to yours without you approving it, nor can any device copy your data without your approval. The only way your data will change is if you specifically request an operation that clearly explains what will happen to your data.
Grocophile does not encrypt your information when transferring data between devices. Just like when you browse the Internet or use other unencrypted protocols, other people on the same network may be able to examine the data you transfer between devices. If you value the privacy of your shopping list data, then we recommend only using WiFi networks that you trust to be secure.
Although every precaution has been made to ensure that you have full control over what happens with your data, any time you use an untrusted WiFi network for any purpose, you may be exposed to hostile activity which can risk data theft or corruption. Always use caution when using an untrusted network.
Grocophile only enables networking when you tap the WiFi button. All network activity will stop when your either complete or cancel a data transfer operation. Once you either get back to the Tools screen or exit Grocophile, all of Grocophile's network activity will be stopped.
That concludes the tutorial! Congratulations and we hope you enjoy using Grocophile to streamline your grocery shopping experience.